Showing posts with label Texture paste. Show all posts

4 August 2016

MIXED MEDIA


MIXED MEDIA ON WOODEN CANVASES


I love working with mixed media as I feel like I have carte blanche to be free and create any piece and change my mind and add elements as the piece develops.  I love working with the different textures to create a 3D effect.  These are a collection of some of my mixed media pieces, which I have created over time.

@The Art of Creativity Studio
African Sunset

African Sunset is a Mixed Media on a wooden canvas. I used various textures to create this piece.  Sand was combined with the texture paste for the bottom right corner. Tissue paper combined with an adhesive for the next layer. I then added hessian with an adhesive. The sun element was created with crackle glaze. Acrylic paint was used to paint the setting and then the Boabab tree and African Elephants were added. The whole painting was then sealed with a varnish to create this African Sunset.  This is a piece which was created at an Itz van Allez Workshop.

Mixed Media on Wooden Canvas @The Art of Creativity Studio
Cosmos
Cosmos was also created at an Itz van Allez Mixed Media Workshop where I fell in love working with my favourite medium.  The wooden canvases were prepared with a layer of dark paint then a texture paste was applied, followed by the sgraffito technique to design the Cosmos. We blended several layers for the rest of the piece. I donated Cosmos as a Raffle Prize to Reach for a Dream for one of their Annual Gala Evenings.

The Art of Creativity Studio
Vintage Paris
Vintage Paris Mixed Media was created for my daughter's tutor class teacher as an end-of-the-year gift.  I used a wooden canvas and 4 wooden coasters and decoupaged Parisian wrapping paper and serviettes to create this vintage look. 


Mixed Media on Wooden Canvas @The Art of Creativity Studio
Paris with Love
Paris with Love used several mixed media techniques to create this piece.  The background board was prepared and serviettes were decoupaged on to it.  The 6 coasters were created by using crackle paste,  texture paste, serviettes adhered with an adhesive, stamps, corrugated card and lace.  I loved this piece and have kept it for myself.


Mixed Media on Wooden Canvas @The Art of Creativity Studio
Nursery Elephants
Nursery Elephants were created for a Baby Shower and the Mom-to-be was creating the Nursery with an Elephant theme using this colour palette.  I created stencils using my Silhouette Cameo and used texture paste to create a lovely 3D effect for the zig zags, flowers, elephants and wording. This was a fun mixed media project to create. 

Mixed Media on Wooden Canvas @The Art of Creativity Studio
Peacock Feather
Peacock Feather was also created for a Reach for a Dream raffle prize.  The wooden canvas was prepared with the base colour, texture paste applied and the Sgraffito technique was used to create the Peacock Feather.  I then used the colours of a Peacock's feather to create the layers of acrylics.

Mixed Media on Wooden Canvas @The Art of Creativity Studio
Hearts Tea Coasters
Mixed Media on Wooden Canvas @The Art of Creativity Studio
Tea Pot Stand
These Tea Coaster and Tea Pot Stands were created using old tea bags.  I dried the tea bags out, removed the tea leaves and cut out the heart shapes/added tea quotes.  Adhered them to the coasters and tea pot stand and then I used Pratliglo, which provided the finished items with a heat and water-resistant finish. These came in handy as gifts for family and friends. 


Mixed Media on Wooden Canvas @The Art of Creativity Studio
Blue Tea Coasters and Tea Pot Stand
The Blue Coasters and Tea Pot Stand were created using a copied image from a serviette which I liked.  I decoupaged them onto the wooden boards and sealed them with Pratliglo.

Mixed Media on Wooden Canvas @The Art of Creativity Studio
2 Fat Ladies Mini Tea Tray and Coaster Set
2 Fat Ladies Mini Tea Tray and Coaster set were also used creating wrapping paper decoupaged onto the coaster and prepared tray and sealed with Pratliglo.

Mixed Media on Wooden Canvas @The Art of Creativity Studio
Relax @10 Tea Tray 
Relax @10 is an original acrylic on canvas which I decoupaged onto a tray which I had already prepared. Instead of the Pratliglo, I used a Heat Resistant varnish to seal the canvas and protect the canvas.  It is just as effective as the Pratliglo, but I must say that I rather prefer the gloss effect of the Pratliglo.  I use this as my serving tray.  I have made prints from the original to use in other pieces.

Mixed Media on Wooden Canvas @The Art of Creativity Studio
Jewellery Mini Tray
This Jewellery Mini Tray was created for my beautician as a jewellery holder for her clients whilst she gave them a beautiful manicure. The same techniques have been used as on the mixed media pieces above.

Mixed Media on Wooden Canvas @The Art of Creativity Studio
Tulip Butterflies
Tulip Butterflies was also created using techniques from above mixed media crafts. This was also a donation for a raffle prize.

Mixed Media on Wooden Canvas @The Art of Creativity Studio
Trio Vintage Collection

These Vintage Collections and Birdie were created using decoupaged serviettes/crackle paste on the frames and vintage images added.  Texture paste was used with a stencil to create the bird effect.
Mixed Media on Wooden Canvas @The Art of Creativity Studio
Vintage Collection
Mixed Media on Wooden Canvas @The Art of Creativity Studio
Birdie


Mixed Media on Wooden Canvas @The Art of Creativity Studio
Shimmy Trinket Box


Mixed Media on Wooden Canvas @The Art of Creativity Studio
Shimmy Shoes


These Shimmy Trinket boxes were created using a Shimmy Craft Metal and embossed. This was then applied to the prepared trinket boxes with a marine adhesive. Embellishments were added to give them some extra bling.


I think that I should also mention the suppliers that I avail of as they deserve a mention in one of my blogposts, as I would not be able to create any of my work without them. 

  The Deckle Edge is where I purchase all of my Fine Art supplies. I purchase the bulk of my paper supplies and acrylic canvases from Artes and I avail of MerryPak for packaging and any other supplies that I may require. 
I have discovered a local brand called Dala, which translated from Xhosa means brings into existence or to create and their products certainly allow for that.  They offer all the products that an Artist requires at a very reasonable rate.  I have used amongst others: acrylics, adhesives, decoupage mediums and ephemeral. Another stockist which I like to avail of is Itz van Allez where I purchase my wooden canvases from and have previously attended Art and Crafts Workshops.  

7 July 2016

ACRYLICS


ACRYLICS ON CANVAS

The Art of Creativity Studio
Acrylics
This Medium is one of my favourites with which to work with. I enjoy the fast-drying darker elements of acrylics. I like working with layers as I find this adds to the depth and dimension of the painting.  This body of work has been created over a few years. Most are my own ideas, some are borrowed and some were copied for practice. 

The Art of Creativity Studio
Cheetah’s Eye:
I used my photo from when I visited the Cheetah Outrage Program at Spier. I only painted the Cheetah’s Eye with Acrylic Paints on Canvas as I wanted to capture the soul of a Cheetah through his lens as I much as I was through my camera lens. 
The Art of Creativity Studio
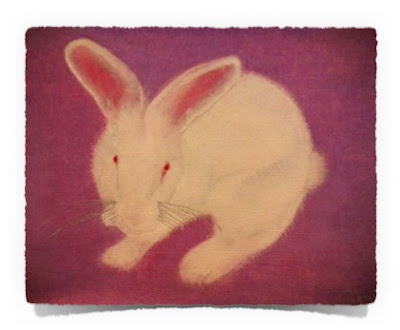
Hopsy:
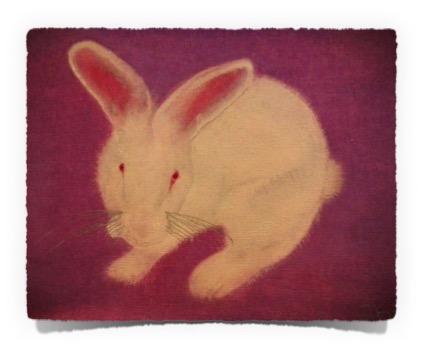
Was my daughter’s beloved pet rabbit who sadly passed away.  This a memento, which I painted using acrylics on canvas for my daughter. 

The Art of Creativity Studio
Autumn Leaf:
My Son went on a Global Young Learners Conference in the States and whilst he was there he took a photo of this Autumn Leaf which had fallen on the ground.  I asked him whether I could paint this image of the Autumn Leaf, using acrylics on canvas, as a keepsake from his trip. 

The Art of Creativity Studio
Coffee Time: 
Was a composition theme at one of the first art classes I took when I first started painting acrylics on canvas. I gifted this to my Mother-in-law who loves coffee. 

The Art of Creativity Studio
Life’s a Beach:
This can be interpreted as you like, but I prefer for it to be a reminder that life can be easy and carefree, if we so choose. This is a miniature Mixed Media Acrylic on Canvas. 

The Art of Creativity Studio
Blouberg:
I used my Photo of Blouberg Beach as a reference to create this Acrylic Painting of Blouberg.  This painting was created for my Nanna who always loved the ocean.

The Art of Creativity Studio
Ethereal: 
It was a cold Winter’s day in Cape Town and this acrylic painting on canvas happened perchance.  I had started painting and did not really like what I had created so I thought that I would experiment with spraying the top of the painting with water.  As the water droplets were running down, I then started to blend it into the painting with this result, which I rather quite like and have left it as such. 

The Art of Creativity Studio
Umbrella:
Reminded me of a lazy Summer’s day on the beach, relaxing and watching the sale boats float by in the distance. Allowing me to drift off to far away places. I used acrylic on canvas and used coarse texture paste for the sand. 

The Art of Creativity Studio
Mermaid:
This was a very different technique which was taught at one of my art classes and which I have not utilised since.  It definitely, allowed more freedom as we used various techniques for each layer. Wet acrylic was allowed to drop down, then a texture paint was applied and then drops of paint were allowed to pool. Lastly the mermaid was drawn on and painted in where needed. 

The Art of Creativity Studio
NEWS:
North, East, West or South. It does not matter where you are in the world, the sun will always set and there will always be another day to start over. Mixed Media acrylic on canvas with gold texture paste.

The Art of Creativity Studio
Relax @ 10:
I love tea, any kind of tea and drink copious amounts each day.  I created this using a stencil and acrylic on canvas, which I have subsequently decoupaged onto a tea tray. 

The Art of Creativity Studio
Angry Bird Pilots:
Acrylics on canvas was created for my hubby who is a pilot. This was created just as
 fun piece for his bar.

The Art of Creativity Studio
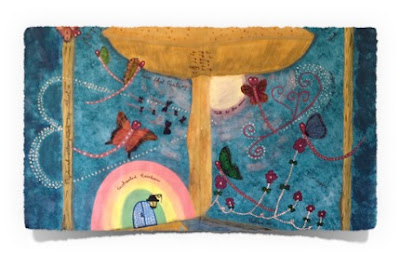
RFAD:
Reach for a Dream is a NGO (Non-Government Organisation) in South Africa, who fulfil the Wishes of Children with life-threatening illnesses.  I support this very worthy Charity Foundation and I painted this acrylic on canvas for their new office in Cape Town. 
The Art of Creativity Studio
Fantasy:
Was a theme created by an artist group which I belonged to on Facebook.  I used acrylic on canvas and had a lot of fun allowing the inner child within to escape and get lost in a Fantasy world. 


The Art of Creativity Studio
SuperHeroVille:
My Nephew, as any young boy does, loves SuperHeros. So with this in mind, I painted this SuperHeroVille for his bedroom using acrylic on canvas.  


21 January 2016

NURSERY ROOM DECORATION


ELEPHANT NURSERY CANVAS'

As Elephants seem to be the trending theme for Nursery Rooms, I decided to create a trio of canvas' for a Baby Shower Gift.

Step 1:  Find some inspiration from the Internet and then use the Silhouette Cameo to produce your own stencils for the project as seen in Image 1. Prepare the wooden canvas with a base coat. I usually use white and then sand for a smooth finish.


Step 2:  Paint your canvas the desired colour.  I chose a limited palette of Violets, Green, White, Grey and Pink. Use a spray mount adhesive (re-positional) to stick your stencil in place. This will prevent it from moving, whilst you are painting and using the texture paste.


Step 3: Ensure that you mark your stencil the right way up. Spread the acrylic texture paste as thickly as desired.  A palette knife works well for this. Allow the texture paste to dry ever so slightly before removing the stencil. Remember to soak your stencil immediately after use otherwise it will be difficult to reuse with texture paste stuck on it. Continue preparing your other canvas' in the same way. 


Step 4:  Placing the stencil back over the dried texture paste will allow you to easily paint the now raised image from your stencil and texture paste.


Step 5: Even though the texture paste is white, I still painted the texture paste wording white as this  helps to seal it and provides a neater finish. 


Step 6: For the elephants I used a coarse texture paste. However, I would suggest not covering the part where you want to add additional texture on top of an already set texture paste as it will make it rather lumpy. (As seen on the elephant on the left, bottom image).


Step 7:  Complete your canvas' with the finer details to finish them off.  Allow the paint to completely dry (you can use a hairdryer to speed-up the process, if you are as impatient as I am to view the completed project).  Lastly, and most importantly to preserve your master-piece, remember to seal the whole canvas, sides included with a few coats of varnish (each coat in a different direction).


The Gift is now ready to be presented and enjoyed. 

27 October 2014

NEW CREATIONS

TEXTURE PASTE


With so many interruptions last week, my creative work had to be shelved....I won't go into to detail, suffice to say that Life gets in the way and one's passion takes a back burner.
Even this morning, I was ready to roll and...but, alas, it wasn't meant to be until later in the morning that I was able to finally get my groove on. 
I quite fancy working with texture paste and well, just about any texture to create mixed mediums. This is one of my creations which I begun today, not sure yet what I'm calling it:

And while the texture paste was out and the above one was drying, I thought that I'd start on a project which I learnt at a Tina Schulling Workshop at Itz van Allez, African Sunset

Lets hope that tomorrow allows me the opportunity to continue on my journey of creativity.